

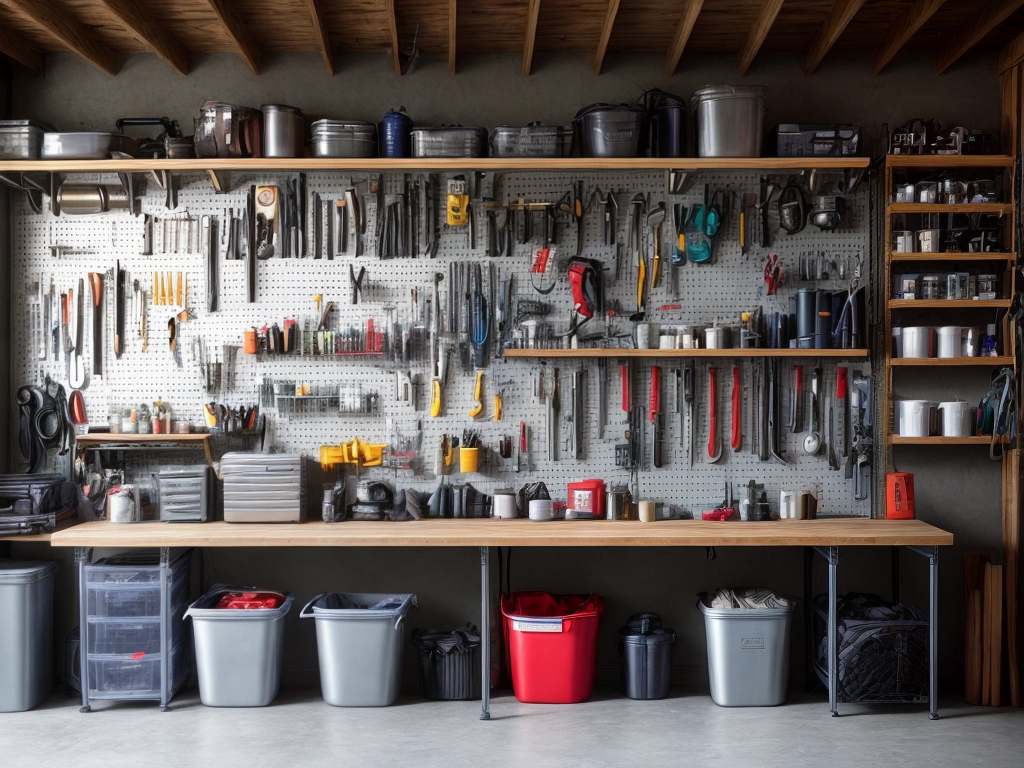
When faced with the challenge of organizing a cluttered workspace or having tools strewn across surfaces, the solution can be simpler than one might think. By carefully selecting the right materials and meticulously planning the layout, a wall-mounted pegboard system can offer a functional and visually appealing storage solution. The process involves precision in measurement, thoughtful consideration of tool placement, and strategic use of accessories to maximize efficiency. With a few key steps and some handy tools, transforming a chaotic workshop into an organized haven is within reach.
Tools and Materials Needed
To assemble the DIY wall-mounted pegboard, gather the following tools and materials. For tool organization, you will need a drill with assorted bits, a screwdriver, a level, a stud finder, measuring tape, pencil, and screws. Ensure you have a hammer, nails, and anchors if needed. Pegboard setup requires the pegboard itself, pegs or hooks, a saw if resizing the pegboard, a straight edge for cutting, and safety equipment such as goggles and gloves. Organize your tools and materials in a clear workspace to prevent any items from going missing during the assembly process. Lay out the pegboard and mark the areas where you need to cut or make holes for electrical outlets or switches. Use the level to ensure the pegboard is straight before securing it to the wall. By having all tools and materials ready, the process of setting up the pegboard will be efficient and organized, allowing for a seamless completion of the project.
Planning and Measuring
I must measure the wall space where I plan to install the pegboard and determine the layout that will best accommodate my tools. By carefully planning and measuring, I can ensure that the pegboard is positioned optimally and that I make the most of the available space. Taking accurate measurements and planning the layout in advance will help me create an efficient and organized tool storage solution.
Measure Wall Space
Upon assessing the available wall space, determine the dimensions needed for the installation of the wall-mounted pegboard. To ensure efficient space utilization and blend functionality with aesthetics, accurate measurements are crucial. Use a tape measure to record the height and width of the designated area. Take note of any obstacles like light switches or outlets that may affect the placement. Below is a table illustrating a simple example of wall space measurement for a pegboard:
| Measurement | Wall Height (inches) | Wall Width (inches) |
|---|---|---|
| Dimensions | 48 | 36 |
Determine Pegboard Layout
Having measured the wall space, the next step involves planning and measuring the layout for the installation of the wall-mounted pegboard. When determining the pegboard arrangement, consider how you want your tools displayed for easy access and organization. Start by laying out your tools on the floor to visualize the best arrangement that suits your workflow. Pegboard design plays a crucial role in maximizing storage solutions. It is essential to ensure that the pegboard layout allows for ample space between hooks or shelves to accommodate various tool sizes. Consider grouping similar tools together to create designated zones for specific tasks. By carefully planning your pegboard layout, you can create an efficient and visually appealing storage solution for your tools.
Selecting the Right Pegboard
When selecting the right pegboard for your DIY tool storage, consider the material’s durability and weight-bearing capacity as crucial factors.
-
Pegboard Material: Opt for tempered hardboard or metal pegboards for enhanced durability and longevity. These materials are less prone to warping or deteriorating over time compared to traditional particle board pegboards.
-
Weight-Bearing Capacity: Ensure the pegboard can support the weight of your tools by checking its weight-bearing capacity. A sturdy pegboard will prevent sagging or bowing, keeping your tools securely in place.
-
Pegboard Size: Choose a pegboard size that fits your workspace and tool collection. Larger pegboards provide more storage space but may require additional support for proper installation. Measure the available wall space and consider the layout of your tools to determine the ideal size for your DIY tool storage needs.
Preparing the Workspace
To prepare the workspace effectively for installing the wall-mounted pegboard, assess the available wall area and gather the necessary tools and materials. Setting up the workspace correctly is crucial for a successful project. Workspace organization ensures efficiency and safety during the installation process. Here is a table outlining the steps to prepare your workspace:
| Step | Description | Tools/Materials Needed |
|---|---|---|
| Clear the Area | Remove any items obstructing the wall where the pegboard will go. | Gloves, Protective Eyewear |
| Measure the Wall | Determine the dimensions of the wall to plan pegboard placement. | Tape Measure, Pencil |
| Set Up Workstation | Create a clear space to layout tools and materials for easy access. | Workbench, Sawhorses |
| Gather Tools | Collect all tools and materials needed for pegboard installation. | Drill, Screws, Pegboard Hooks |
Installing the Pegboard
Before securing the pegboard to the wall, it’s crucial to ensure it is mounted securely using appropriate hardware. Once in place, strategize the arrangement of tools based on frequency of use and size, making the most commonly used items easily accessible. This thoughtful organization will not only enhance efficiency but also maintain a neat workspace.
Mounting Pegboard Securely
Securing the pegboard to the wall is a crucial step in ensuring its stability and functionality. When mounting your pegboard, consider the following steps for a secure installation:
-
Locate Studs: Use a stud finder to locate the wall studs. Mark these locations on the wall to ensure your pegboard is anchored to sturdy support.
-
Anchoring Techniques: Opt for heavy-duty screws or anchors that are suitable for your wall type. Ensure they are long enough to penetrate the wall and reach the stud for maximum support.
-
Even Distribution: Place screws or anchors at regular intervals along the edges and across the center of the pegboard to distribute weight evenly and prevent sagging over time.
Arranging Tools Strategically
Arranging tools strategically on the pegboard involves optimizing space utilization for efficient storage and accessibility. When organizing your tools, consider grouping them by type or frequency of use to enhance workflow and save time searching for specific items. Below is a table illustrating a sample layout for tool organization and space optimization:
| Tools | Placement |
|---|---|
| Screwdrivers | Top row, left side |
| Pliers | Top row, right side |
| Hammer | Middle row, center |
| Wrenches | Bottom row, left side |
| Tape Measure | Bottom row, right side |
Organizing Your Tools
When organizing your tools on the wall-mounted pegboard, categorize them based on their functionality and frequency of use for maximum efficiency. This method ensures that your tools are easily accessible and that you can quickly locate them when needed. Here are three key steps to effectively organizing your tools:
-
Group by Functionality: Arrange your tools based on their functions. For example, keep all screwdrivers together, all wrenches in one area, and all measuring tools in a designated section. This grouping method helps you quickly identify the tool you need for a specific task.
-
Prioritize Frequently Used Tools: Place the tools you use most often within easy reach. This could mean hanging them at eye level or in a central location on the pegboard. By doing this, you streamline your workflow and save time searching for commonly used tools.
-
Label and Color-Code: Consider labeling each section on the pegboard or using color-coded markers to distinguish between different tool categories. This visual cue makes it easier to spot where each tool belongs, encouraging you to return them to their designated spots after use.
Adding Accessories and Hooks
To optimize the functionality of your wall-mounted pegboard for tool organization, consider strategically incorporating various accessories and hooks tailored to your specific tool collection and workspace requirements. Pegboard accessories such as shelves, bins, and tool holders can enhance the efficiency of your storage system by providing designated spaces for different types of tools. Utilizing hooks of varying sizes and shapes allows for easy access to frequently used tools while keeping them neatly organized.
When selecting accessories and hooks for your pegboard, it is essential to assess the types of tools you use most frequently. For smaller hand tools like screwdrivers and pliers, consider using smaller hooks or magnetic tool holders. Larger tools such as hammers or power drills may benefit from sturdy shelves or brackets. By customizing your pegboard with the right accessories, you can maximize the available space and create a visually appealing tool storage solution that suits your workflow. Remember, the key to effective tool organization lies in the thoughtful selection and arrangement of pegboard accessories.
Maintenance and Upkeep
Proper maintenance and regular upkeep of your wall-mounted pegboard are crucial for ensuring its longevity and optimal functionality. Here are some essential tips to help you keep your pegboard in top condition:
- Tool Maintenance and Organization:
- Regularly inspect your tools for any signs of wear or damage. Replace or repair them as needed to prevent any accidents or malfunctions.
- Keep your tools clean and well-organized on the pegboard. This not only makes them easy to find but also helps prevent rust and corrosion, extending their lifespan.
- Consider labeling each hook or section of the pegboard to maintain a consistent organization system. This will save you time and effort when searching for specific tools.