

When it comes to handcrafted pottery, the possibilities are endless – trust me, I’ve seen it all. From the moment you feel the clay between your fingers to the final firing in the kiln, there’s a sense of satisfaction that comes with creating your own dishes. But before you dive into this rewarding craft, understanding the basics is key. Join me as we explore the essential tools, techniques, and tips to help you embark on your pottery journey.
Choosing the Right Clay
When selecting the ideal clay for pottery, consider the unique characteristics of each type to ensure the best results. Clay types vary in their composition and suitability for different firing methods. For beginners, I recommend starting with versatile stoneware clay, known for its durability and ease of use. This clay type is suitable for both low and high firing temperatures, allowing you to explore different firing methods as you progress in your pottery journey.
Experimenting with coloring and texturizing techniques can elevate your pottery pieces. From oxides and underglazes for coloring to impressing textures using tools or natural materials, such as leaves or fabrics, the possibilities are endless. These techniques add depth and visual interest to your creations, making them truly unique.
Essential Pottery Tools
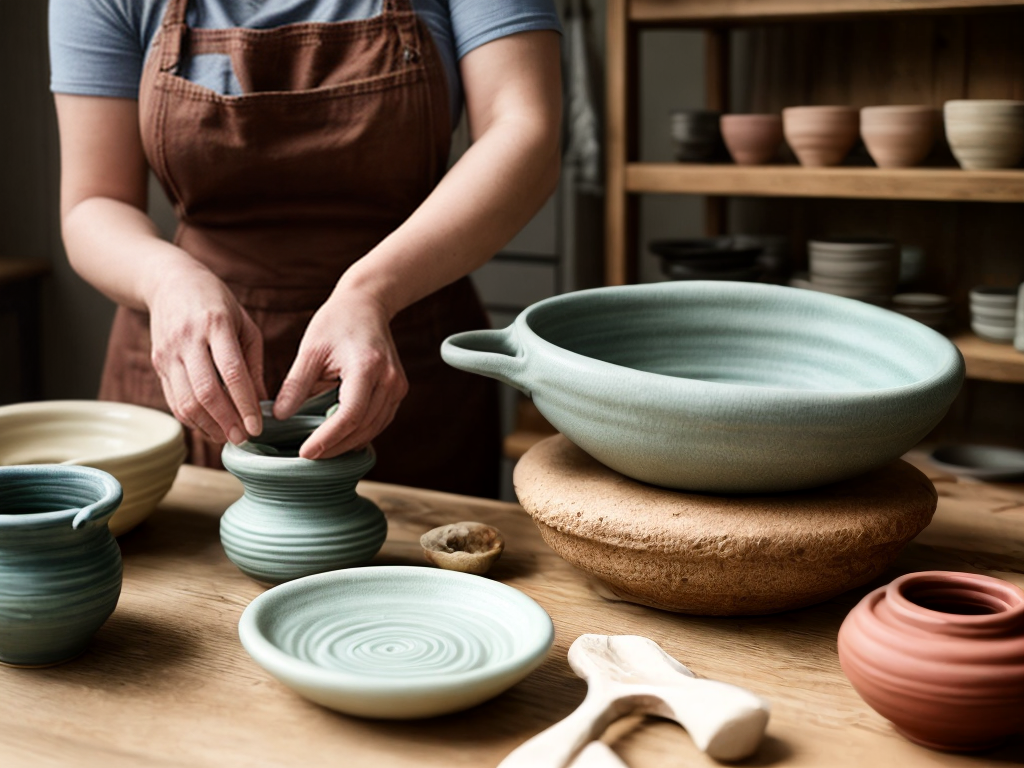
Exploring the world of handcrafted pottery requires a selection of essential tools that are vital for shaping, embellishing, and perfecting your creations. To ensure your pottery journey is a successful one, it’s crucial to have the right tools at your disposal. When setting up your studio, consider investing in a pottery wheel, kiln, various clay sculpting tools, a wire tool for cutting clay, ribs for shaping, a sponge for smoothing, and a sturdy apron to protect your clothes.
Proper tool maintenance is key to extending the lifespan of your equipment. Keep your tools clean and dry after each use to prevent rust or damage. Store them in a designated area within your studio setup to maintain organization and accessibility. Regularly inspect your tools for any signs of wear and tear, replacing or repairing them as needed. By taking care of your tools, you’ll ensure they remain in top condition, ready to help you bring your pottery visions to life.
Basic Handbuilding Techniques
Delving into handbuilding techniques in pottery involves mastering the art of sculpting clay with your hands to create unique and personalized pieces. When starting your handbuilding journey, two fundamental techniques to explore are coil building and pinch pottery. Here’s a breakdown of these techniques:
- Coil Building: This method involves rolling out long, snake-like coils of clay and then stacking and smoothing them together to form the desired shape.
- Pinch Pottery: With pinch pottery, you start with a ball of clay and use your fingers to pinch and shape it into a hollow form, such as a bowl or cup.
- Creativity Unleashed: Handbuilding allows for endless creativity as you mold the clay into your envisioned designs.
- Personal Touch: Each piece crafted through handbuilding carries the unique imprint of your hands, making it truly one-of-a-kind.
- Therapeutic Process: Working with clay in handbuilding can be a relaxing and meditative experience, offering a therapeutic outlet for creativity.
Wheel Throwing Fundamentals
Let’s dive into the fundamental techniques of wheel throwing in pottery. Centering practice is key to creating balanced pieces. Start by wedging your clay to remove air bubbles and ensure consistency. Place the clay on the wheel and center it by applying pressure with your hands. Once centered, you can begin shaping your piece. Experiment with throwing variations like cylinders, bowls, or vases by adjusting your hand movements and pressure on the clay.
Moving on to trimming basics, this step refines your piece. After the clay has dried to a leather-hard state, use trimming tools to carve away excess clay and create clean edges. Pay attention to the thickness for even drying and firing. Lastly, finishing touches elevate your pottery. Consider adding textures, handles, or spouts to personalize your creation. Remember, practice and patience are key in mastering wheel throwing techniques.
Understanding Glazing
Let’s explore the art of glazing in pottery. Glazing serves as both a protective layer and a decorative element on ceramic pieces. By understanding various glazing techniques, the importance of proper glazing, and some expert tips, you can enhance the beauty and functionality of your handcrafted pottery.
Glazing Techniques Overview
Exploring various glazing techniques is essential for creating unique and stunning handcrafted pottery pieces. When it comes to glazing, there are several techniques to consider:
- Brush Techniques: Using different types of brushes can create various textures and patterns on your pottery.
- Layering Colors: Experimenting with layering different colors can result in beautiful and intricate designs.
- Dipping Method: Dipping your pottery into glaze can create a smooth and even finish.
- Sponging Technique: Sponging glaze onto your pottery can give it a more organic and textured look.
- Spraying Method: Spraying glaze onto your pottery allows for a more even and consistent application.
These techniques offer endless possibilities for adding character and style to your handcrafted pottery pieces.
Importance of Glazing
Understanding the importance of glazing in pottery is crucial for achieving desired aesthetics and enhancing the durability of your handcrafted pieces. Glazing application plays a vital role in pottery as it not only adds color and texture but also acts as a protective layer, making the pottery food-safe and more resistant to wear and tear. Without glaze firing, the pottery remains porous and susceptible to moisture absorption and damage. Proper glazing techniques can elevate the overall look of your creations, creating a professional finish that is both visually appealing and functional. By mastering the art of glazing, you can ensure that your handcrafted pottery pieces stand out and last for years to come.
Tips for Glazing
To enhance your pottery pieces and ensure their longevity, mastering effective glazing techniques is essential. When it comes to glazing, consider these tips:
- Glazing inspiration: Look for inspiration in nature, art, or even everyday objects for unique color combinations.
- Color combinations: Experiment with different color combinations to create depth and visual interest in your pottery pieces.
- Glazing application: Practice different glazing techniques such as dipping, pouring, or spraying to achieve varying effects on your pottery.
- Brush techniques: Develop your brush techniques to create intricate designs or patterns on your pottery pieces.
- Consistency is key: Ensure your glaze consistency is just right – not too thick or too thin – for a smooth and even finish on your pottery.
Firing and Kiln Basics
When it comes to handcrafted pottery, understanding kiln temperature control and the types of firing processes is crucial. Kiln temperature control ensures the pottery is fired at the correct heat for durability and aesthetics. Different firing methods such as bisque firing and glaze firing also play a significant role in determining the final outcome of the pottery.
Kiln Temperature Control
Maintaining precise control over the kiln temperature is crucial for successful firing of handcrafted pottery. To ensure a successful outcome, consider the following tips:
- Regular kiln maintenance is essential to guarantee temperature accuracy.
- When glaze firing, monitor the kiln closely to achieve the desired results.
- Proper heat distribution within the kiln is key for even firing of pottery.
- Use pyrometric cones to verify the temperature accuracy inside the kiln.
- Implement a gradual temperature increase and decrease to prevent cracking in the pottery.
Types of Firing
Understanding the different types of firing is essential for mastering the basics of pottery kiln operations. Two common methods used in pottery are Raku firing and Pit firing.
| Firing Type | Description |
|---|---|
| Raku firing | Originating in Japan, Raku firing involves removing pottery from the kiln while it’s glowing hot and placing it in a container with combustible materials to create unique patterns. It results in vibrant colors and metallic finishes. |
| Pit firing | Pit firing is a primitive technique where pottery is buried in a pit with combustible materials like sawdust, wood shavings, and leaves. The pit is then set on fire, and the pottery is slowly fired. This method produces earthy, natural tones and unpredictable patterns. |
Experimenting with these firing techniques can add a distinctive touch to your pottery creations.
Troubleshooting Common Mistakes
To troubleshoot common mistakes in handcrafted pottery, carefully inspect the form and structure of your piece. When faced with issues such as cracks or warping, here are some tips to help you overcome these challenges:
-
Kiln Troubleshooting: Ensure that your kiln is reaching the correct temperature and firing your pottery evenly. Check for any hot or cold spots that could be causing inconsistencies in the firing process.
-
Handbuilding Challenges: If you encounter difficulties with handbuilding, try using scoring and slipping techniques to strengthen connections between clay pieces. Properly compressing the clay can also help prevent cracks during the drying and firing stages.
-
Cracking Concerns: To avoid cracks, make sure your pottery is uniformly thick. Uneven thickness can lead to stress imbalances, causing your piece to crack.
-
Warped Forms: If your pottery is coming out warped, try drying your pieces slowly and evenly. Uneven drying can cause the clay to shrink at different rates, resulting in distorted forms.
-
Surface Imperfections: Smooth out any rough spots or air bubbles on the surface of your pottery before firing to prevent blemishes in the final piece.
Decorating Your Finished Pieces
When finishing your handcrafted pottery pieces, consider experimenting with various glazes and surface treatments to enhance their visual appeal and texture. Color choices play a significant role in the overall look of your pottery. Bold, vibrant colors can make a statement, while softer hues create a more delicate feel. Don’t be afraid to mix and match colors to create unique combinations that reflect your style.
Finishing touches are essential for giving your pieces a polished look. Consider adding personalized designs such as etched patterns or hand-painted details. These creative details can make your pottery pieces truly one-of-a-kind. Additionally, experimenting with different textures through techniques like carving or stamping can add depth and visual interest to your finished pieces.